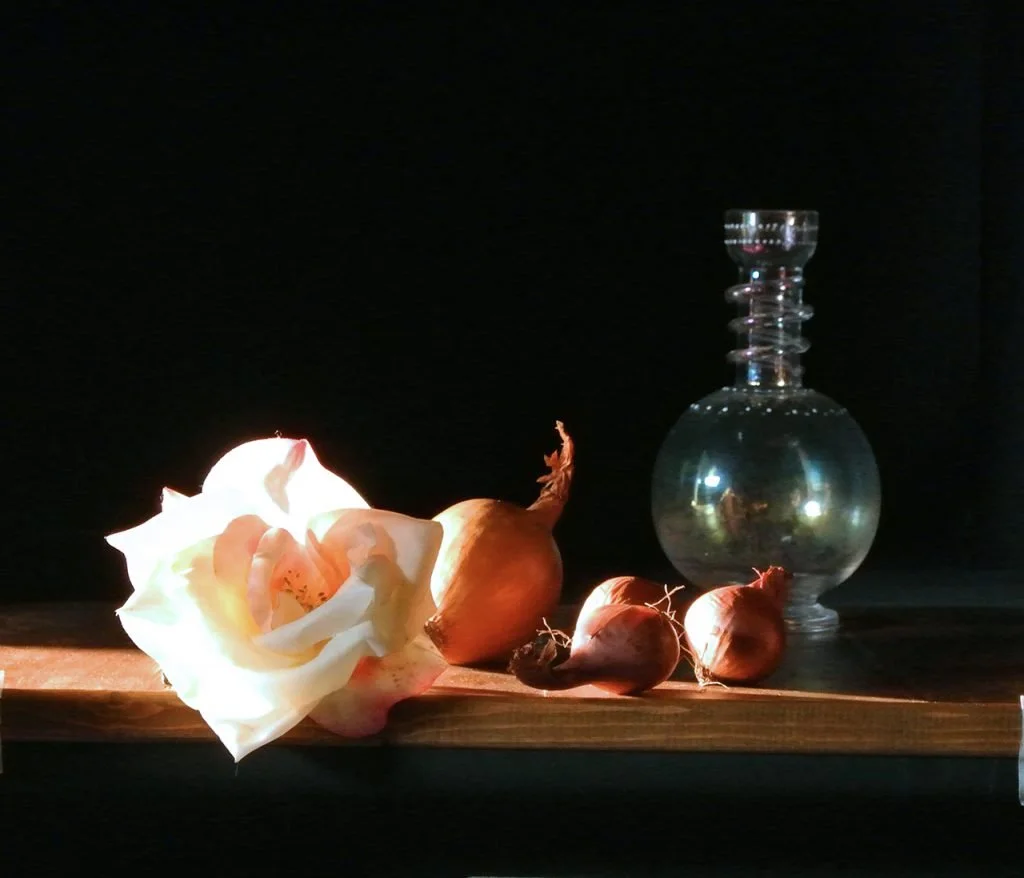
White Roses and Shallots
A wide range of people read this blog. I know some people – who don’t paint – may have heard – or even said!
“I wouldn’t know where to begin!”
If that is you . . . . . you may just want to look at the pictures but if not . . . . . . . . do read on
Drawing – a voyage of discovery
What comes first? Setting up the composition and drawing it out /blocking it in. This first stage shapes the painting, it’s good to keep and open mind, to be really sure that it’s going to please you and that you are learning something from your subject.
Coming from a discipline where accuracy in drawing is important, I think like this:
When we are making a painting – we are drawing with paint, not just lines but masses, brush strokes that have volume and width. The placement of these lines and masses of various lights and darks and their colours, are what makes a believable Realist Painting that convey solidity and space. Allow your subject to help you by looking searchingly for each line, proportion angle . . .
Some Principles
Lets start with a few general principles which are used at the beginning of each drawing or painting – the very basis of ‘all of it’.
General to Specific
My subject is lit by a strong light that gives clear and moderately dramatic shadows. The easel is angled in a way so that I can use this one strong light source to paint by. I’m excluding light from other sources so the shadows are clearly shaped.
I am painting a composition on a rectangle, the canvas, how will the placement work within that rectangle. How high, or low or centrally do I want things to be?
To help answer this
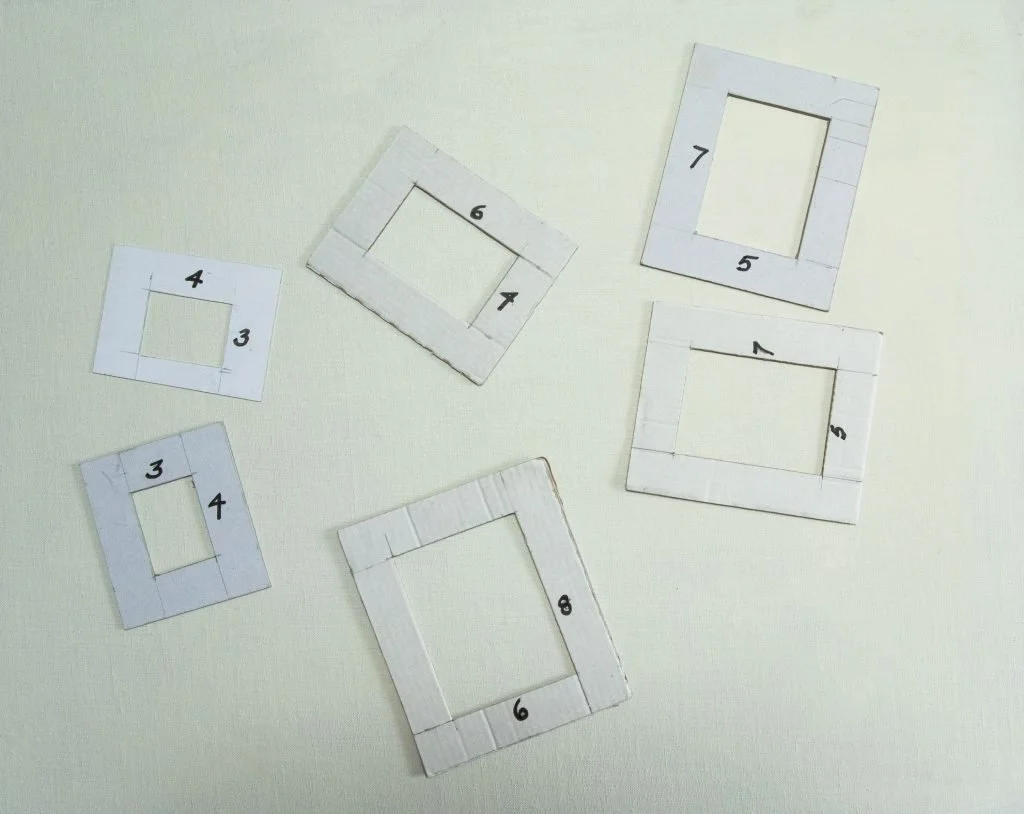
Suggestion: Make a small frame preferably made out of grey cardboard. Cut a window to the proportion of the canvas. Holding this ‘window’ in front of yourself at different distances, frame the still life in different ways . . . play around with different compositions . . . do a few sketches or take photos and look at them. Looking at a photo can help see the overall composition.
Card frames with different proportions
This is the crop I chose – I like things to be really big on the canvas with space at the top – to breathe. Even when the canvas is small it makes the image much stronger, closer and more splendid. I have blackout curtains and it just happened, when I was setting this up that I had opened one of the curtains a little. By pure chance – this lovely shaft of sunlight streaked across the composition, backlighting the rose – giving that wonderful stained glass flatness to the petals that were acting like a filter for the strong light.
This inspiring light effect needed to be replicated. I used a light with a narrow beam . . . and with a bulb lasted 7 hours . . . I counted the painting hours in bulb replacements!
Blocking in the Drawing
This is my favorite way. I use a dry bristle brush with raw umber oil paint, and I use as little paint as possible. Slowly plotting and drawing thick, faint straight or nearly straight lines things take shape.
Reliable reference points – that is what is wanted. I know I shall have to ‘nudge and shift’ things a little as the work progresses – hence the thick lines.
Here you can see part way through the process – I’ve got enough ‘things’ in place and can make horizontal and vertical alignments. Example: The top of the rose on the left, lines up just below the middle of the circular vase.
I’m linking everything together and I’m thinking of each thing against or next to something else in the composition.
I check the position of what I draw with the linear alignment holding my measure (usually a thin, poker-straight metal knitting needle) either absolutely vertically, or absolutely horizontally.
But I did start by finding one or two objects/ measurements that I use as a ‘canon’ or ‘unit’ of measurement. It is a slow painstaking process but well worth the efforts and nowadays – I really enjoy it!
The first drawing uses only straight lines. I have to admit that the vase is curved here but you can see the straight lines I used to get there.
I would recommend you look on YouTube for ways to do Sight Size or Comparative measurement. There is plenty there and helps to see it in action.
Some of those wise words
Don’t leave anything on your canvas that you see is wrong!
Keep an open mind. Something can look wrong because something else is affecting it – ask yourself questions and look at ‘negative shapes’ to check your answers.
Here you can see how toning the shadow areas with dry paint on a dry brush gives you the composition. Group the shadows together as much as you can.
Dry brush? No medium? This is not Alla Prima painting. Instead it is a way to build up a painting in layers over time letting each layer dry before working on.
Once the overall drawing is in place and I am happy with this stage, I start refining the thick lines, paring them down to thin, specific lines. My favorite way to do this is with an old, worn down size 2 or 4 filbert bristle brush used like an eraser/ pusher/ pencil (nothing else is used, just the dry brush and it works well). Keep looking and checking. I use measurements and alignments lots as I find more and more that link together in this way.
Take a step back and look at the Composition you have in front of you Blocked In on your canvas or board. Like it? It will be the scaffolding of your work, so make sure.
I’m repeating myself but for this way of working accuracy plays a part. So . . .
When you are happy with your composition, its placement on your canvas or board and its interest, start putting in the colours . . . and that’s just what we’ll do in the next post.
Have a go, I’m happy to help, just let me know. Next steps in the post – coming soon.
Here are a few descriptions of things I’ve said
Chroma
Some paint colours are high chroma some are low. The low chroma will have a low tinting power. This means they will have a small effect on changing the colour of another paint. As you get to know the colours you paint with you will recognize this. Do get to know a small range of colours and make them work for you. You need remarkably few tubes of paint but lots of understanding.
Drawing
As I write this, I am aware as always that the very first and last consideration is the drawing. Working at accuracy is so useful as it is the fundamental tool in realist painting, best done with practice and care.
I recommend you look on YouTube for a method of drawing – Sight Size or Comparative Measurement. There are some great teachers of these skills and it’s worth taking time – and very fascinating, in a frustrating and difficult way!
Glossary of some expressions
Value, Hue, Chroma, Block In Large Local Colour:
Value is how light or dark
Hue is the colour family
Chroma is how vivid that colour is
Block In is the initial drawing of the work – can also have the shadows toned in
Large Local Colour is the average of a particular area.
These are working principles which took me a while to understand. But once I did I found that I can go back a step when things get muddled or confusing, or if I’m not happy with things and want to go back to somewhere that I liked, then make progress from there.
Every single painting I make is practicing as each set up is different. I’m never aiming at the finished painting – I simply want to know HOW? Same as everyone!


